
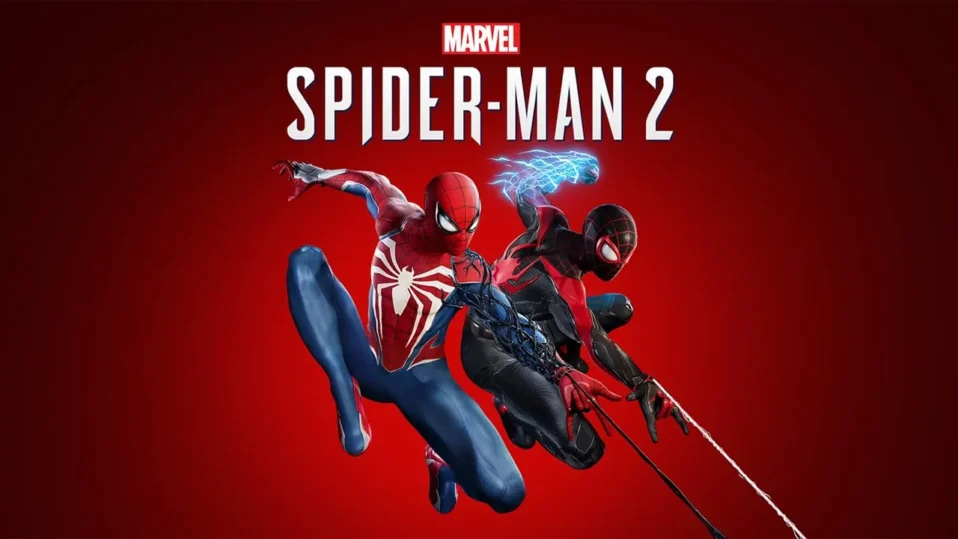
The easiest way to install mods in Marvel’s Spider-Man 2 on PC is with Overstrike, a free mod manager that handles everything in a few clicks. No file swapping, no digging through game folders by hand.
I’ve been modding Spider-Man 2 since the PC release, and Overstrike is the tool I keep coming back to. It supports the four main mod formats: .stage, .suit, .modular and .script files. That covers almost everything, from new suits to world tweaks.
In this guide, I’ll walk you through the whole process step by step. By the end, you’ll have your first mod running. As an example, we’ll install the popular Vader’s 2007 Raimi Symbiote Suit mod.
How to Install Mods in Spider-Man 2: Step-by-Step
The whole setup takes about five minutes. After that, adding new mods takes seconds.
Step 1: Download Overstrike
Grab the latest version of Overstrike from the link below. It’s the go-to mod manager for Spider-Man 2 and handles .stage, .suit, .modular and .script files.
Step 2: Install .NET 7.0 Desktop Runtime
Overstrike won’t work without the .NET 7.0 Desktop Runtime. Download and install it from the link below.
Step 3: Extract Overstrike to Any Folder
Overstrike doesn’t need an installer. Unzip it into any folder you like, such as your Desktop or a dedicated “Mods” folder. It doesn’t have to be inside the game directory.
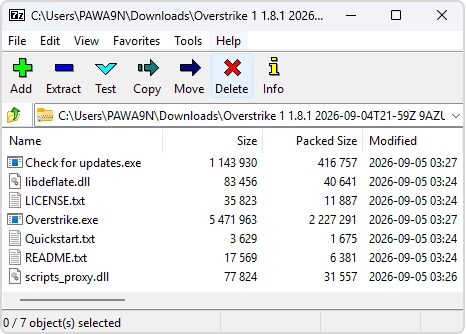
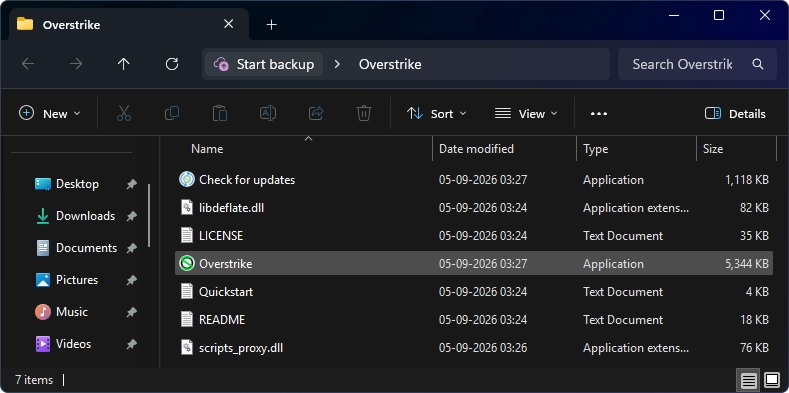
Step 4: Run Overstrike
Open the folder you extracted and launch Overstrike.exe.
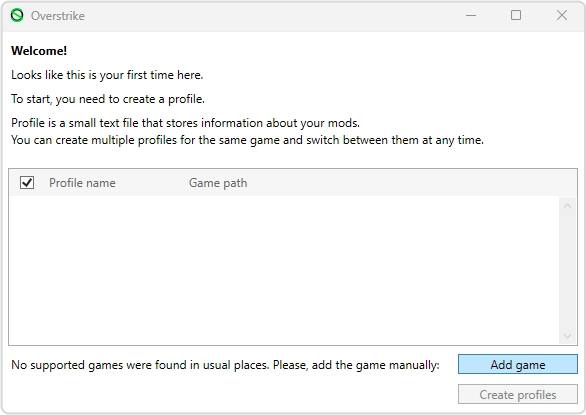
Step 5: Add Your Game
A welcome screen will appear. Overstrike often detects the game automatically. If it doesn’t, click the Add game button.
Step 6: Choose the Game Folder and Name Your Profile
Browse to the folder where Spider-Man 2 is installed. Then give your profile a name. Anything works; I named mine “Spider Man 2”.
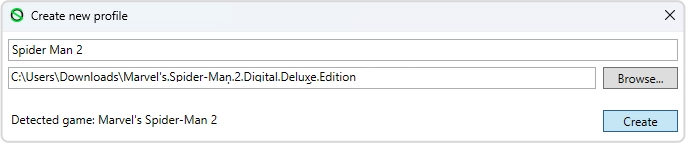
Step 7: Create the Profile
Click the Create profiles button. Overstrike will save your game setup.
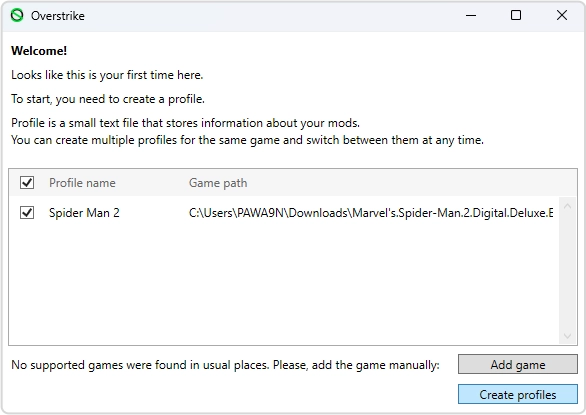
Step 8: Open the Mods Section
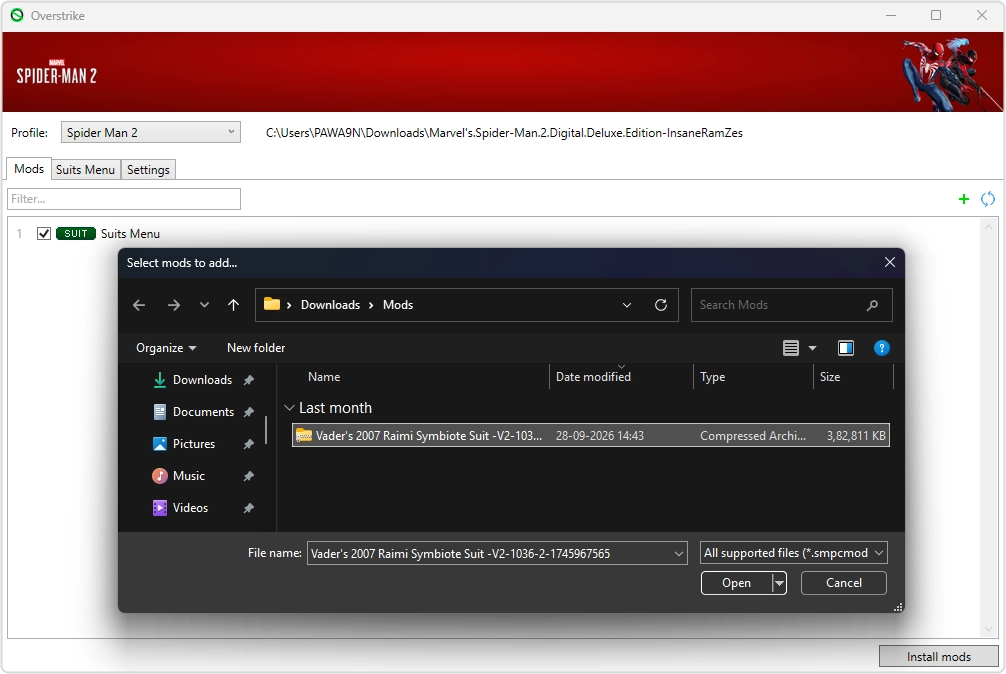
The Overstrike Mods section opens next. This is where you’ll manage every mod you install. Click the green + icon to add a mod.
Step 9: Select Your Mod’s Zip File
Pick the mod’s .zip file from your computer. For this tutorial, I’m adding Vader’s 2007 Raimi Symbiote Suit mod.
Step 10: Enable the Mod
Your mod now shows up in the list. Tick the checkbox to enable it, or untick it to turn it off without deleting it.
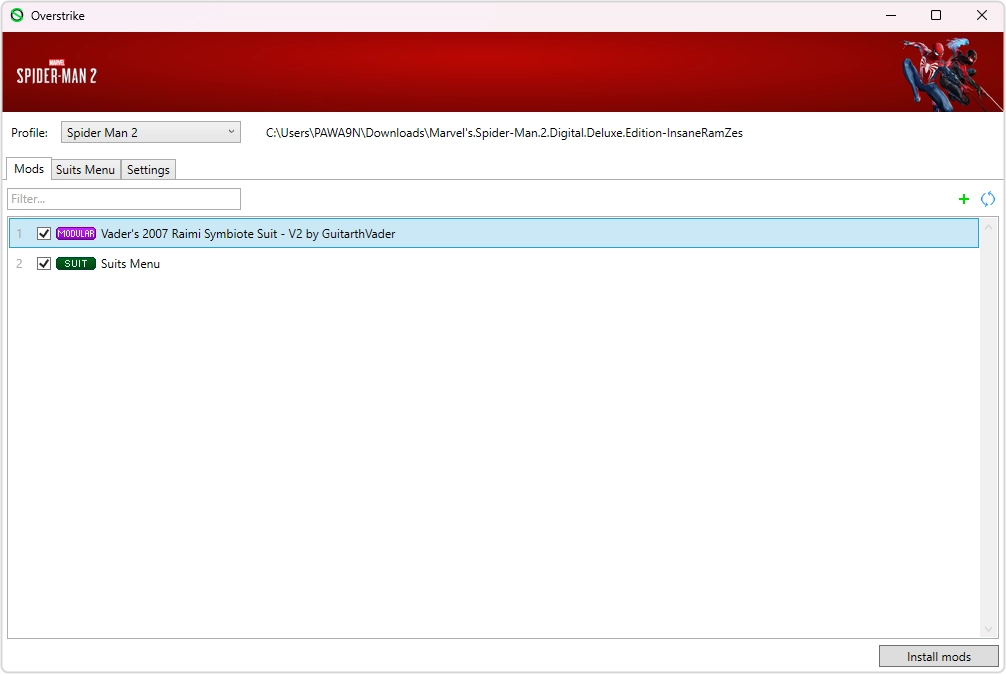
Step 11: Install Mods and Launch the Game
Click Install mods in the bottom-right corner. Once it finishes, launch Spider-Man 2 the way you normally do. Your mod will be active in-game.
Pro Tip: Some mods are modular, which means you can switch parts of them on or off. To do this, right-click the mod in Overstrike and choose Edit modules…
In the Raimi Symbiote Suit mod, for example, you can enable or disable the Symbiote and Surge Suit Replacer separately. Make your picks, then click Install mods again so the changes apply.
FAQ: Installing Spider-Man 2 Mods
Overstrike won’t open. What’s wrong?
The most common cause is a missing .NET 7.0 Desktop Runtime. Install it, restart your PC, and try again.
My mod isn’t showing up in-game.
Check that the mod is ticked in the list and that you clicked Install mods afterward. Mods also need to match your game version, so check the mod page for updates.
How do I uninstall a mod?
Untick the mod in Overstrike and click Install mods again. Overstrike will rebuild your game files without it.
Will a game update break my mods?
It can. After a patch, reopen Overstrike and click Install mods again. If a mod still fails, wait for the mod author to release an update.
Is modding Spider-Man 2 safe?
Modding single-player content is widely done. Stick to trusted sources, and avoid running unknown .exe files bundled with mods.
Final Thoughts
That’s all it takes to install mods in Marvel’s Spider-Man 2. Set up Overstrike once, and every new suit or tweak is just a few clicks away. Now go swing around New York in that classic Raimi symbiote suit.
Got stuck on a step? Drop a comment below and I’ll help you out.